While waiting for AIT3 I put you this tutorial to launch your fullnode. Launching your fullnode is not an obligation to be selected for the AIT3 but could possibly increase your chances to be selected.

Who am I
I am passionate about the world of blockchain and I would like to share my passion and research with you through my articles in giving you my perception and opening new doors to very early crypto projects.
Discord: Akabane#3147
EN Official Announcement canal
FR Officiel canal d’annoncement
Read every story from Dr_jackal (and thousands of other writers on Medium)
Introduction to Aptos Labs
Aptos is a new, independent project to fulfill our vision of delivering the safest and most production-ready blockchain in the world.
EN Official Announcement canal
FR Officiel canal d’annoncement
Part 01: How order and configure your VPS server in 2 minutes
Before installing the node you need to rent a VPS server
The advantages of VPS are that they have high availability and are easy to configure.
Of course I’ll explain how to rent a VPS server at a lower cost and especially how to configure it in less than 2 minutes.
Let’s go…
Order your VPS on Contabo by clicking here.
To be completely transparent with you this is an affiliate link that you can use even if you already have an account on Contabo. Thank you in advance.
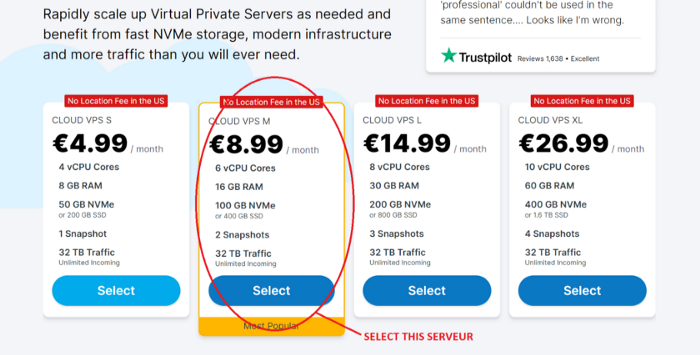
Select Cloud VPS M

1 month for the rental period, you can extend later if needed
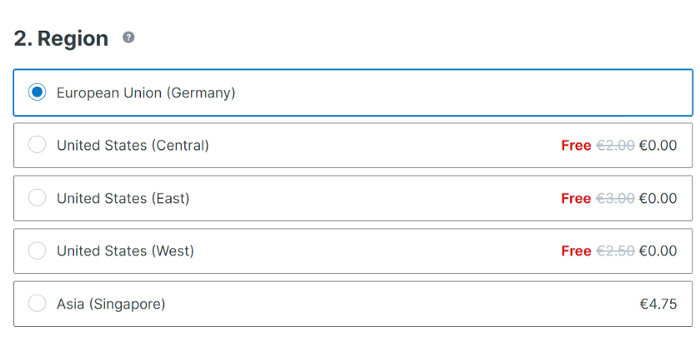
Do not change anything for the geolocation of your VPS server
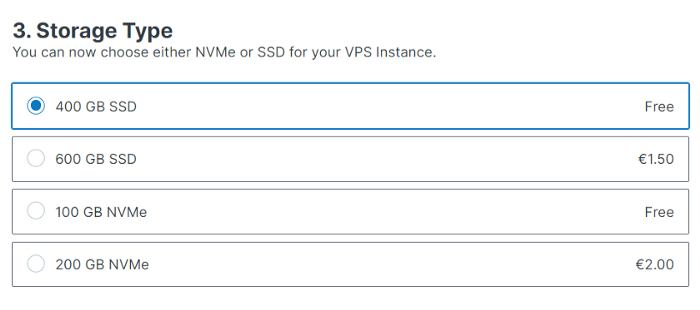
Select 400GB SSD for storage type
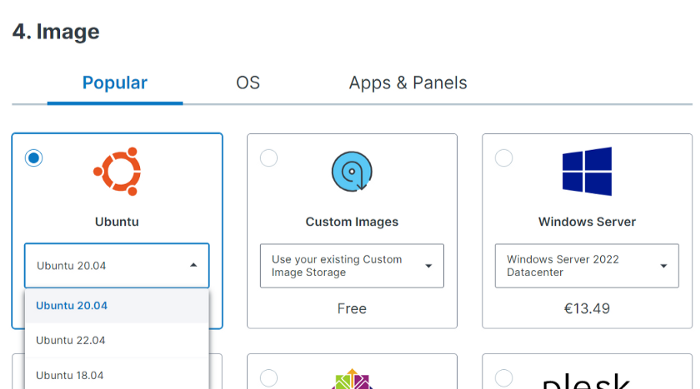
Select Ubuntu 20.04
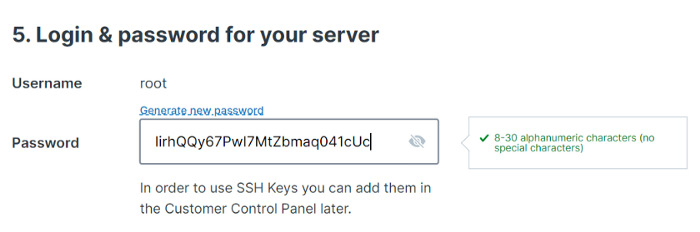
Generate your passport and copy and paste it now into a notepad that will be saved on your computer
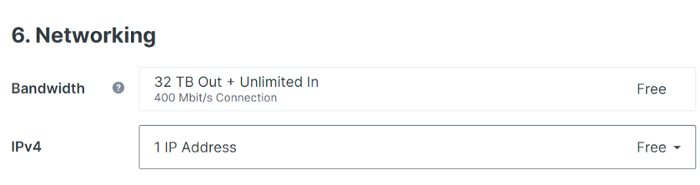
Don’t touch anything
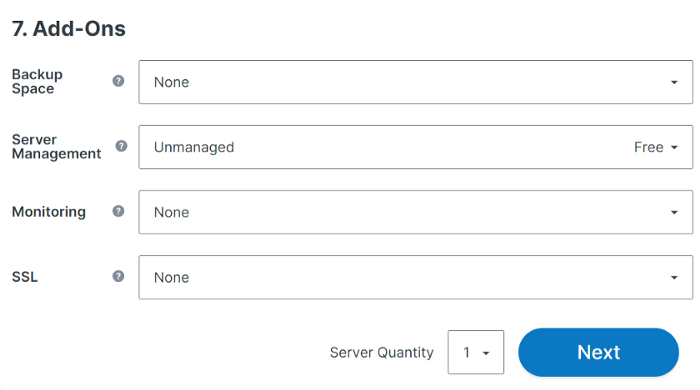
Don’t touch anything and click on “NEXT”
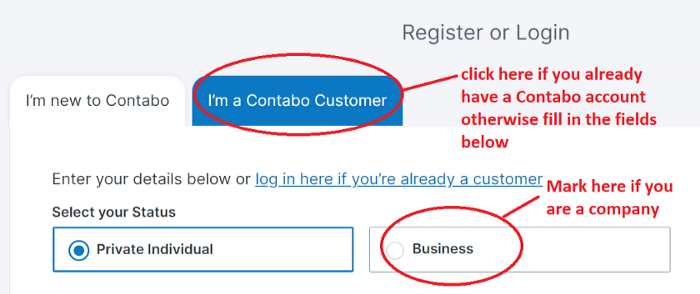
If you are new to Contabo and you are an individual, do not touch anything
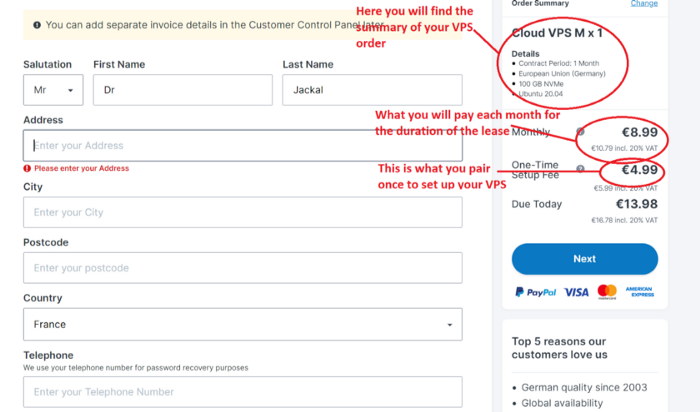
Fill in the fields with your personal data
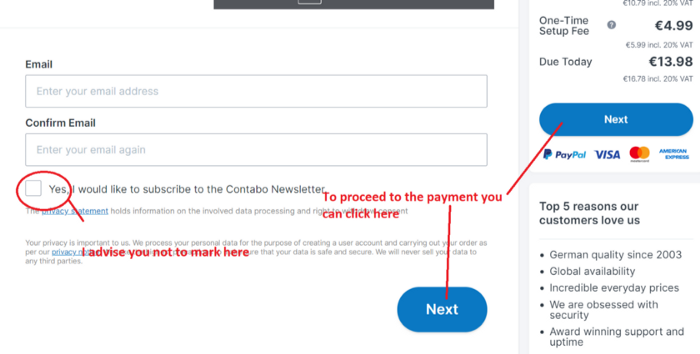
Finish filling in the last fields with your personal information and click on Next button to proceed to payment
Once you have finished paying for your order. You will receive a first email.
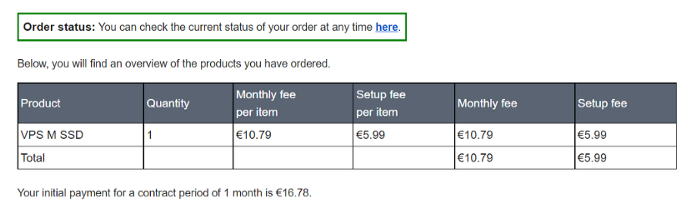
Corresponding to the status of your order
And approximately 15 minutes later you will receive a second email with all the information to connect to your VPS.
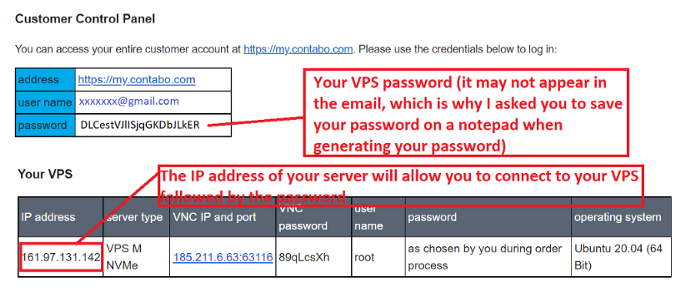
The login details to connect on your VPS
Part 02: How to connect to your VPS
With MacOS:
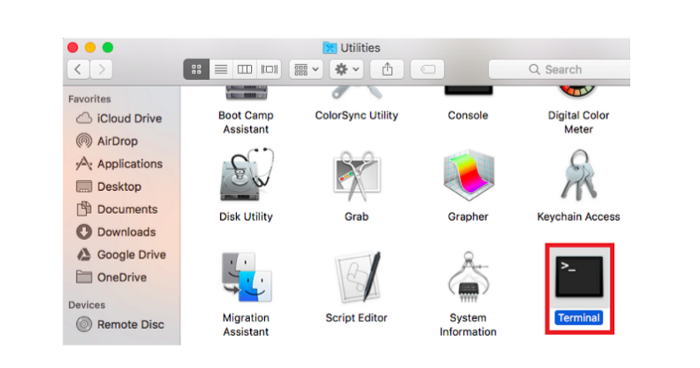
MacOS includes already a SSH command. To connect via SSH from this operating system, first open the Terminal window. You can find this tool by going to “ Application->Utilities->Terminal”.
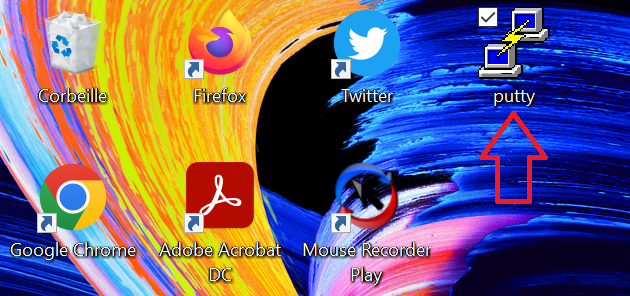
With Windows : I invite you to download Putty by clicking “here**” (**You can directly download the installation file with this link).

This is the file illustrated in the image above, if you wish to download another one click on this “link”
Now open the .exe file to start the installation of Putty and follow the instructions to complete the installation. At the end of the installation you will have a shortcut to Putty on your desktop.
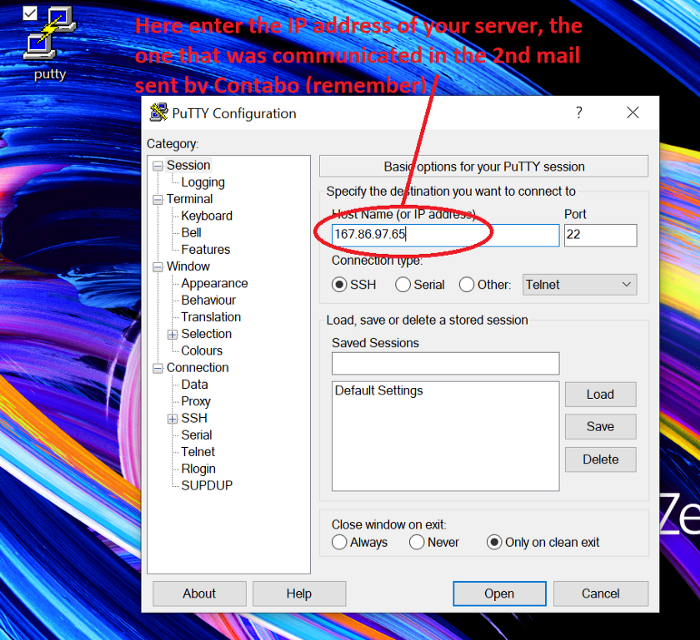
Now launch Putty
Launch Putty, a new window will open in which you will enter the IP address of your VPS and click on Open
The interface of your server will open and will ask you for the login details.
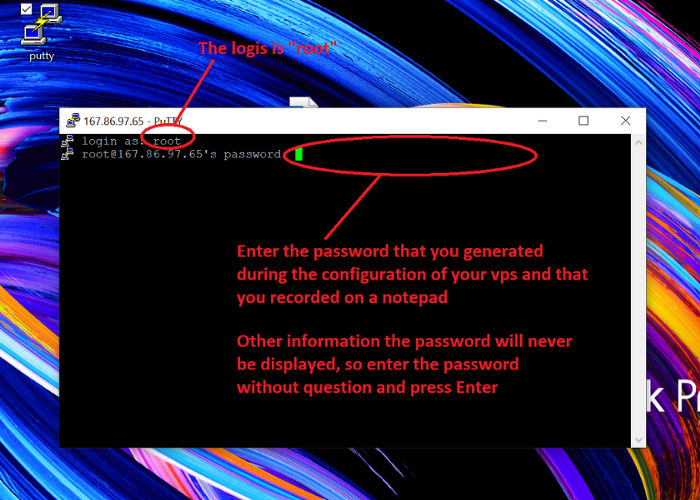
Now you are finally on your server (see image below):
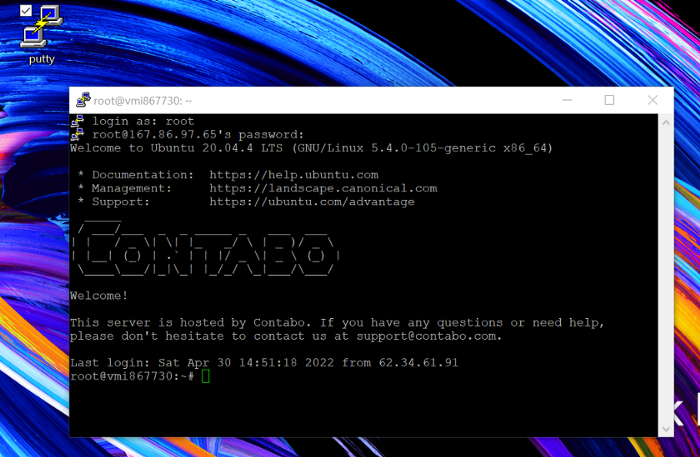
Tip 1: To paste any command that you have already copied above, just right-click where you want to paste the command
Tip 2: Only paste or write a command when your vps server allows it. As soon as “root@vmxxxxxxxxx: “is visible you can write otherwise you have to wait

In this example you have permission to write or paste a command
Now you are ready to get serious. You just have to paste one by one the commands that I put at your disposal below. Take your time and make sure you have taken the order from start to finish.
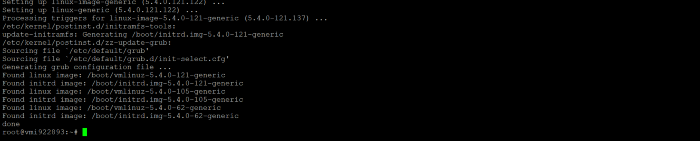
To help you I have put some screenshots showing the result you should get each time you paste a command.
Best of luck…
Part03: Preparation
Update packages:
sudo apt update && sudo apt upgrade -y
Intall dependencies:
sudo apt-get install jq unzip -y

Screen installation
sudo apt install screen

when he asks you to press Y and then ENTER on your keyboard

Install git:
apt install git

Press Y and Enter

Install cargo:
apt install cargo

Press Y and Enter

Part04: Download Aptos Core prepare your developer environment
Clone the Aptos Repo:
git clone https://github.com/aptos-labs/aptos-core.git

And
cd aptos-core

Prepare your developer environment
./scripts/dev_setup.sh

Press y and Enter

Update your current shell environment
source ~/.cargo/env

Part05: Setup Your Full Node
Checkout the testnet
git checkout --track origin/devnet

create a copy of the fullnode config template
cp config/src/config/test_data/public_full_node.yaml fullnode.yaml

Part6: Download Genesis and Waypoint
Download genesis.blob
curl -O https://devnet.aptoslabs.com/genesis.blob

Download Waypoint.txt
curl -O https://devnet.aptoslabs.com/waypoint.txt

Part9: Modify the Config
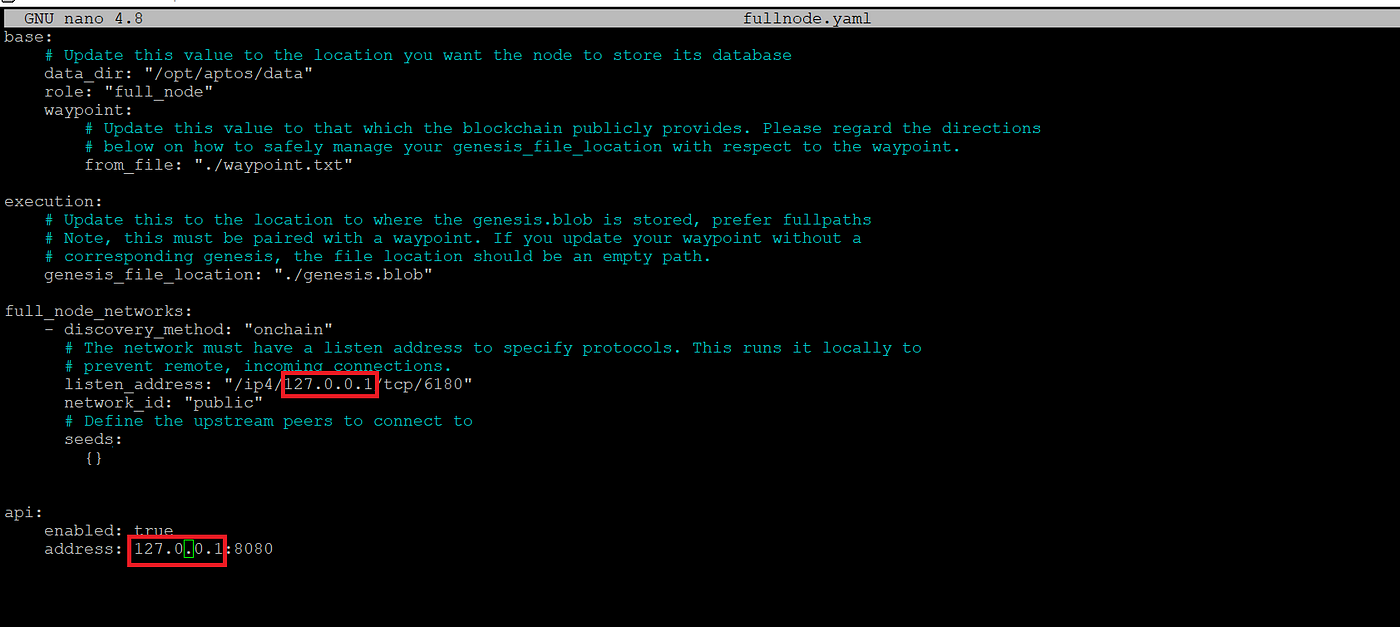
Open your config file
sudo nano /root/aptos-core/fullnode.yaml

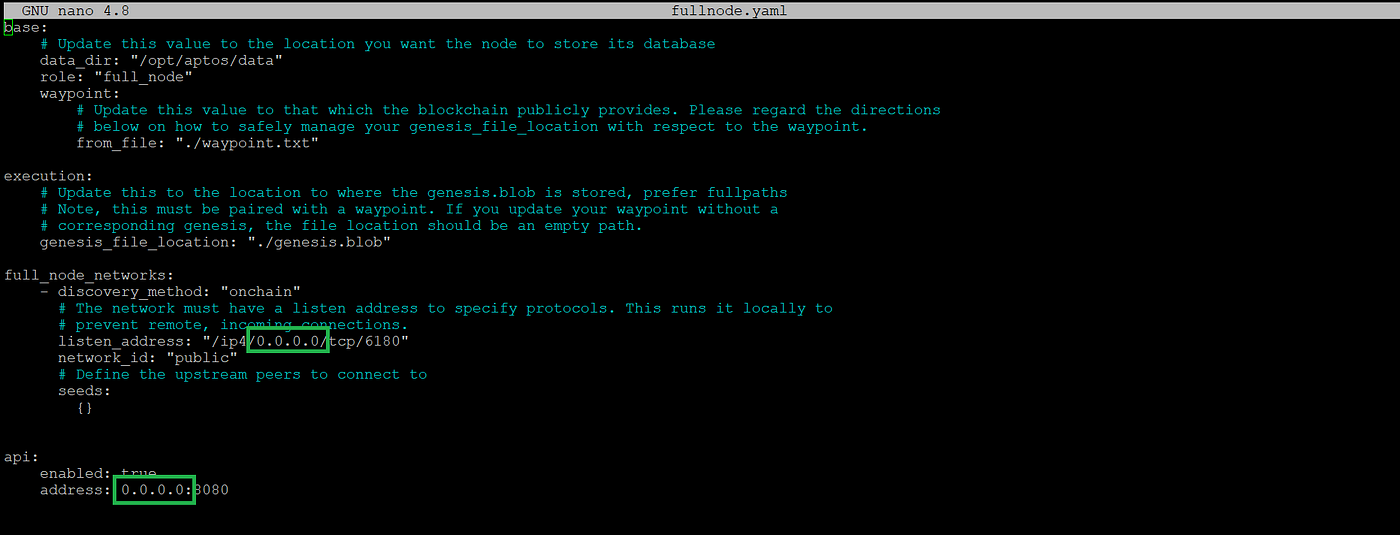
now modify the config: Remplace 127.0.0.1 by 0.0.0.0 ine red area and in blue area enter peers:
After modification:
Now press CTRL+X

Output
Press Y

Press Enter

Part10:Open ports
Go to the root
cd $home

And use this command
apt install ufw -y ufw allow ssh ufw allow https ufw allow http ufw allow 6180ufw allow 6182 ufw allow 80 ufw allow 9101 ufw allow 181 ufw allow 182 ufw allow 8080 ufw allow 9103 ufw enable

Press enter

Press y and Enter

Part11: Aptos CLi
cd aptos-core
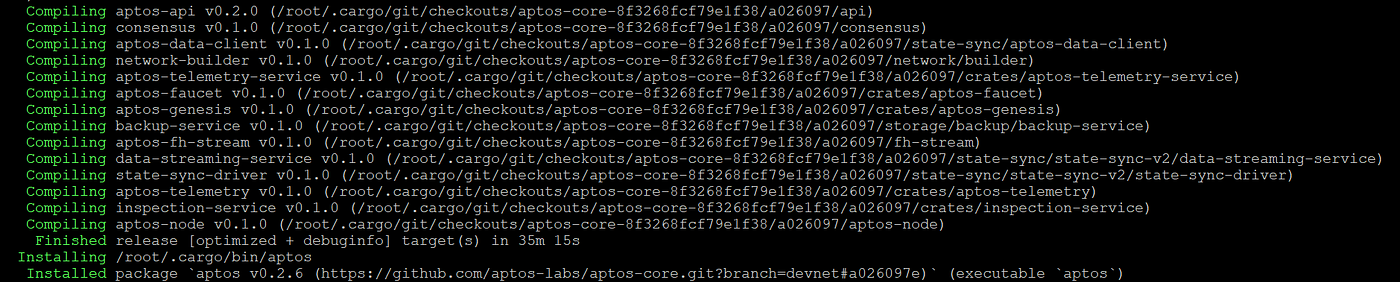
Install Aptos cli 2.6
cargo install --git https://github.com/aptos-labs/aptos-core.git aptos --branch devnet
Part12: Generate Keys
Generete key
aptos key generate --key-type x25519 --output-file /root/aptos-core/private-key.txt

Your are generate public and private key
Open public key
sudo nano /root/aptos-core/private-key.txt.pub
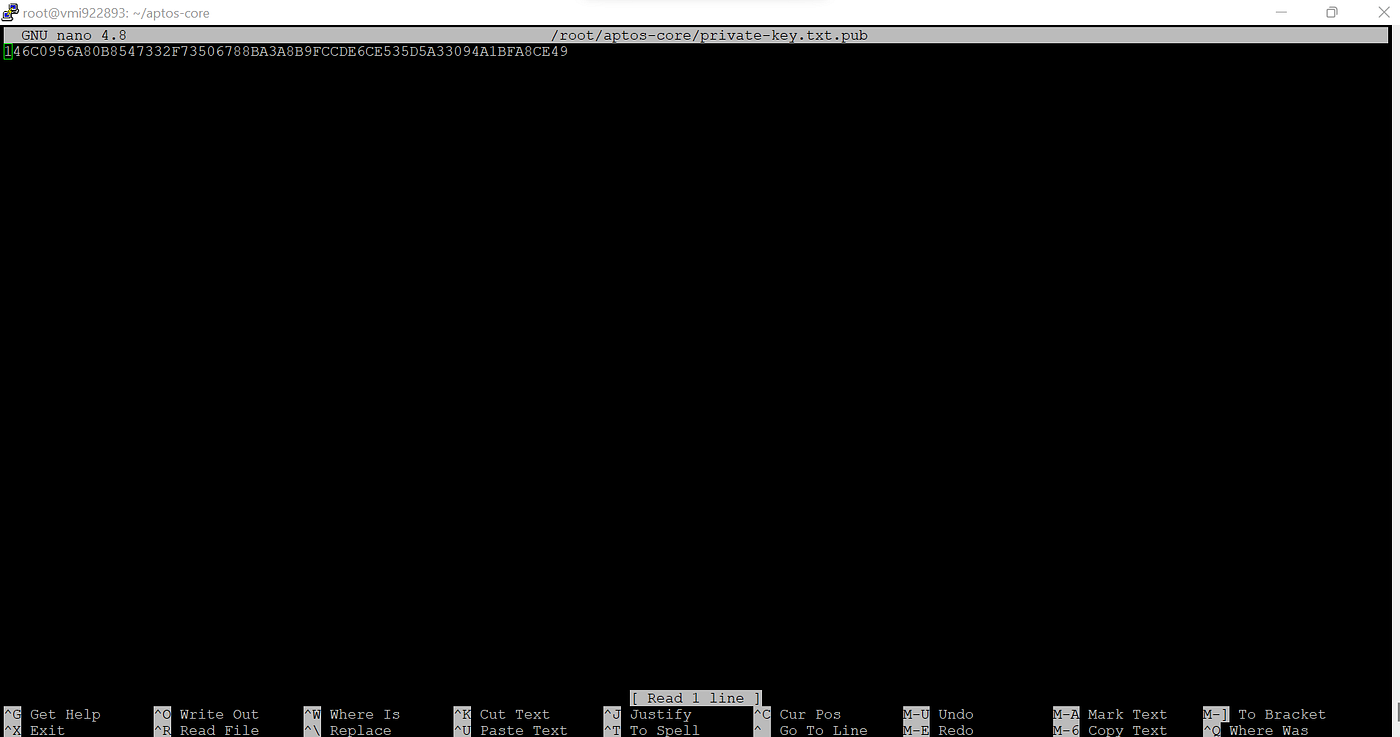
Save all information on a notepad and quit whit ctrl+x
Open private key
sudo nano /root/aptos-core/private-key.txt
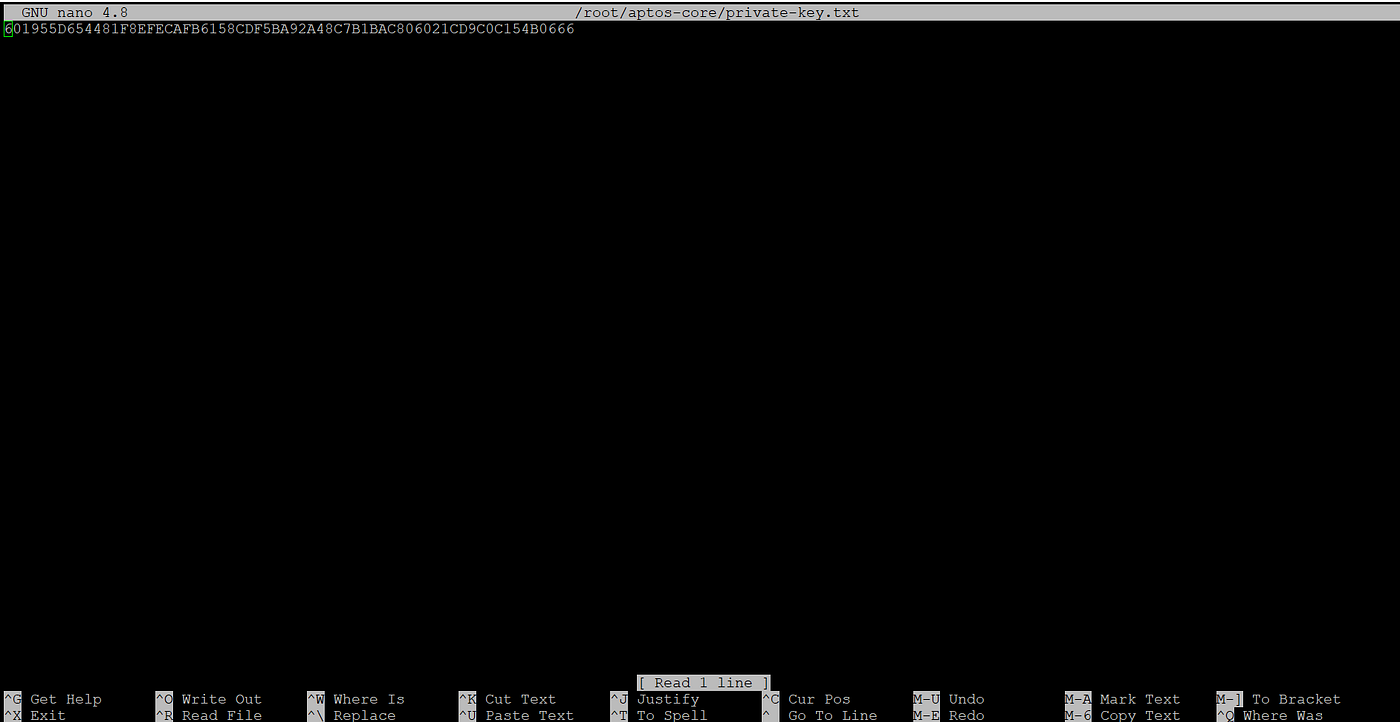
Save all information on a notepad and quit whit ctrl+x
Genere peers:
aptos key extract-peer --private-key-file private-key.txt \ --output-file peer-info.yaml
And type:
sudo nano peer-info.yaml

Part13: Launch your Fullnode
Start your local fullnode by running the below command:
cd aptos-core
Create a screen session called “aptos-core”
screen -S aptos-core
cargo run -p aptos-node --release -- -f ~/aptos-core/fullnode.yaml

Please Wait…
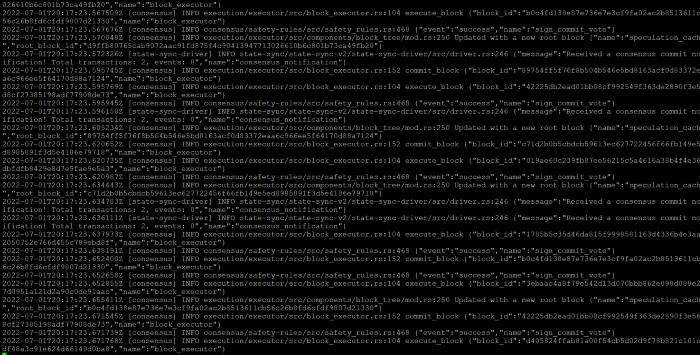
Press Ctrl+A then D

Now you can close Putty
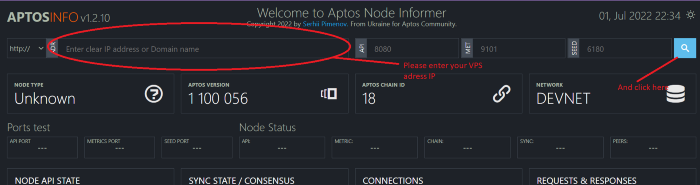
Part14: Check your Fullnode Status
Please click here

Congratulation Everything it’s OK!
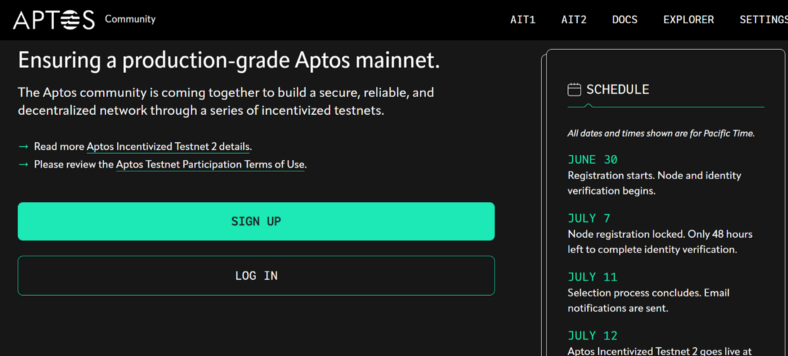
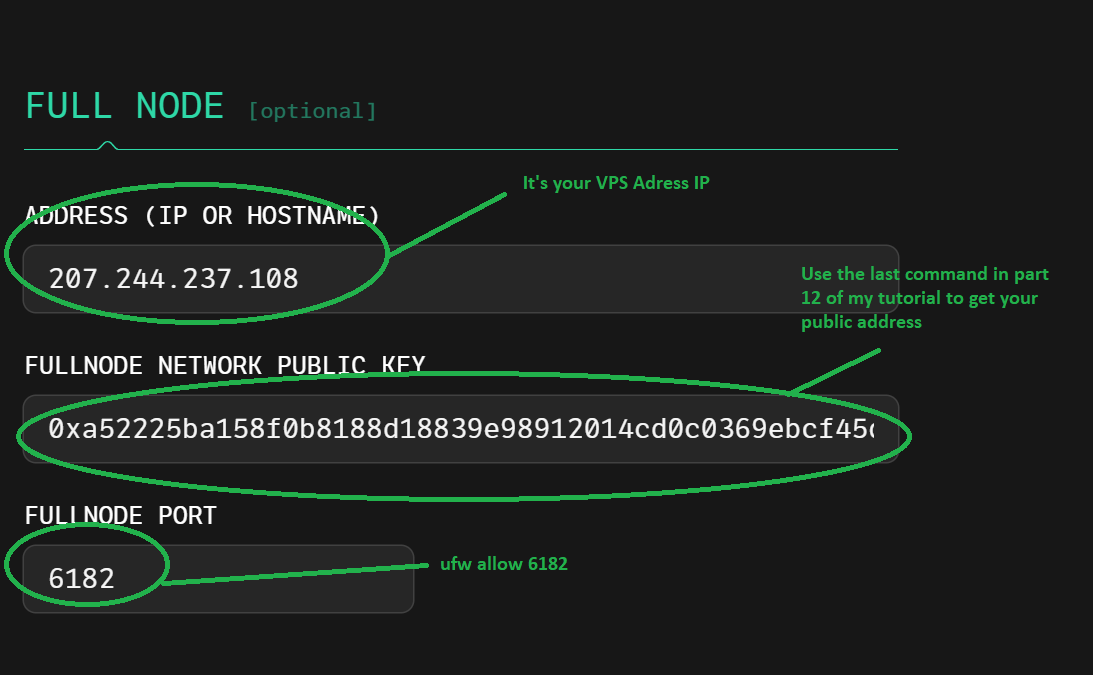
Part15: Register your validator node
Please click here
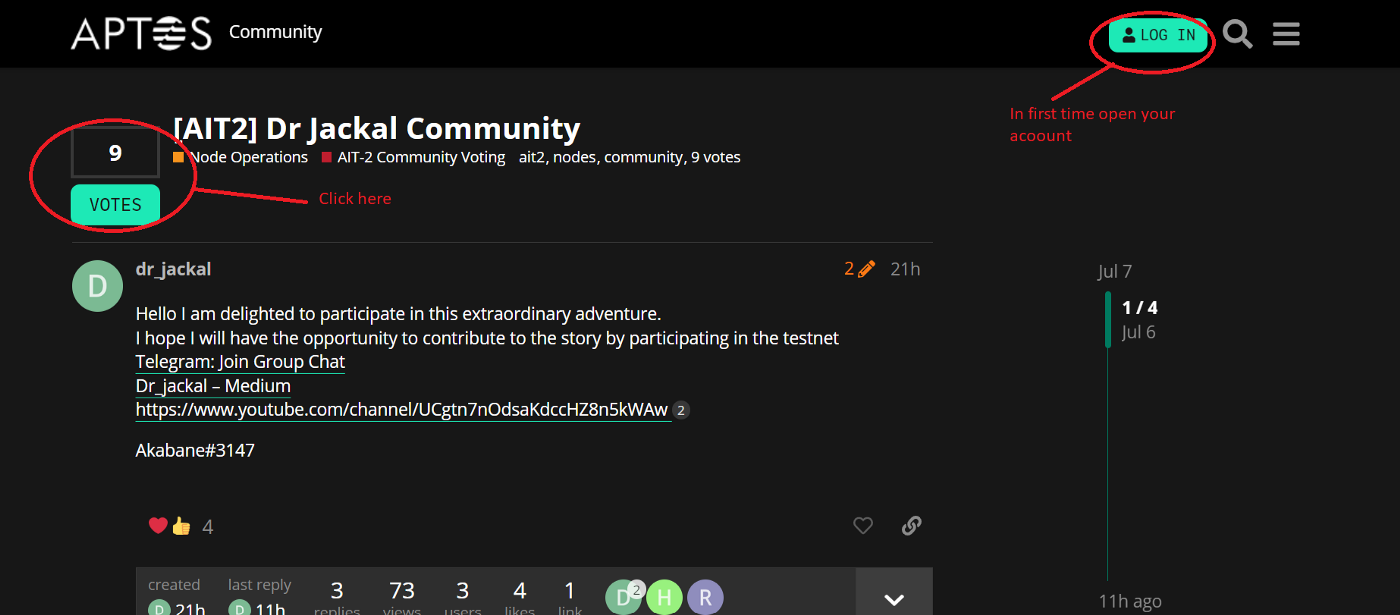
Part16: Leave comment on APTOS FORUM
😅
Please click here
See you soon!!!
Please join Dr Jackal Community for any support please don’t forget subscribre my My Youtube channel and follow my medium.
Optionnal: How to upgrade your fullnode if needed:
Restart your vps via your contabo account

Delete the data folder
sudo rm -rf /opt/aptos/data

Delete Genesis and Waypoint
cd aptos-core
And
sudo rm -rf genesis.blob
And Then
sudo rm -rf waypoint.txt
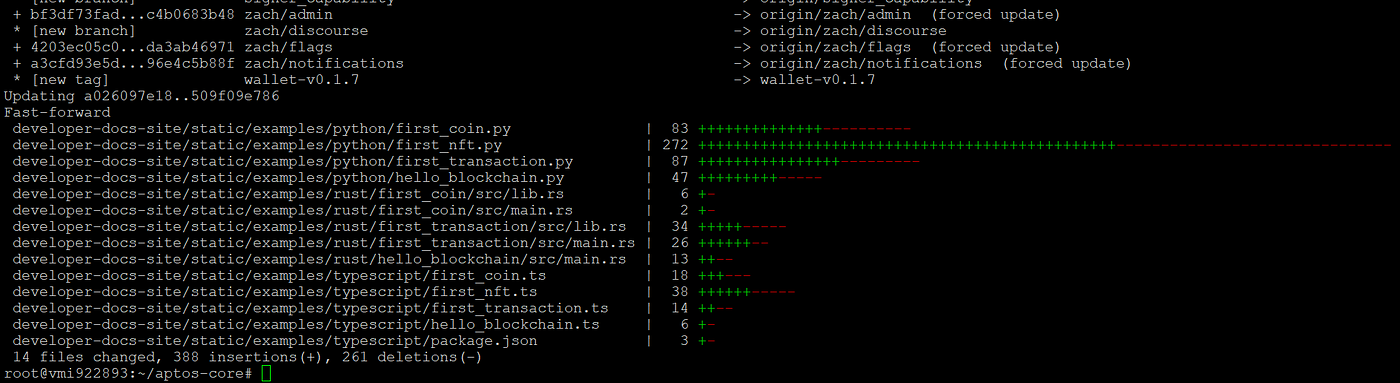
Pull the latest of the devnet:
git checkout devnet && git pull
Donwload genesis and waypoint
sudo wget -O genesis.blob https://devnet.aptoslabs.com/genesis.blob

sudo wget -O waypoint.txt https://devnet.aptoslabs.com/waypoint.txt

Start your local fullnode by running the below command:
Create a screen session called “aptos-core”
screen -S aptos-core
cargo run -p aptos-node --release -- -f ~/aptos-core/fullnode.yaml
Please Wait…
Press Ctrl+A then D
Now you can close Putty
Check your statut of your fullnode here

Thank you for your time, if you like this kind of content, don’t hesitate to check my other articles and my videos on youtube channel.
Discord: Akabane#3147
EN Official Announcement canal
FR Officiel canal d’annoncement
Read every story from Dr_jackal (and thousands of other writers on Medium)